WordPress Multilingual Plugin (WPML) is used on sites that have more than one language. Ex. English/Spanish or English/French. If your site is not multilingual and you are interested in using this tool please reach out to our Solutions Engineering team.
Personalization and Geofence capabilities are available in specific OEM packages.
1. CHECK FOR SHORTCODE
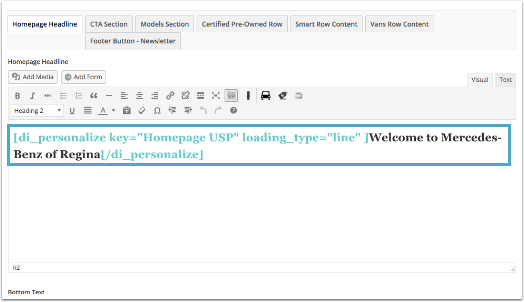
If the Personalizer shortcode has been added to the Homepage USP text area, you will see it when you edit the Homepage. Typically, this area will be called either “Additional Frontpage Content” or “Homepage Headline.” The Personalizer shortcode will look similar to the one shown above in blue, with “Homepage USP” within the brackets.
2. ADD YOUR NEW PERSONALIZER ON THE ENGLISH SITE
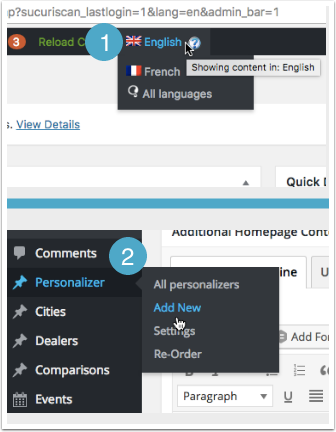
1. Double Check you are on the English site by looking at the language toggle on the top WordPress menu bar.
2. If the shortcode is present, and the English site is up, you can start creating Homepage USP Personalizers. Click on “Personalizer,” then “Add New.”
NOTE: If the shortcode isn’t present, please contact the DICE team.
3. START BUILDING YOUR PERSONALIZER
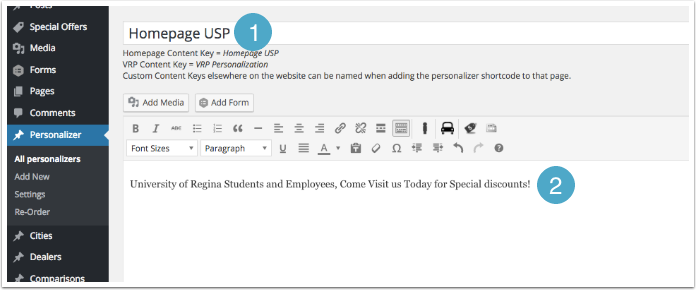
1. In the Content Key area (top bar), type “Homepage USP” for a message displayed on the Homepage. Type “VRP Personalization” for a message or banner displayed on a Vehicle Results page.
NOTE: In order for your Personalizer to work on the Homepage, you have to name it exactly Homepage USP or it will not fire. The same applies for the VRP Personalization. Best practice is to copy and paste.
2. After you have entered the content key, type your personalized message in the WYSIWYG content box under the “Visual” tab. Use the “Text” tab for HTML.
4. ADD YOUR TAG
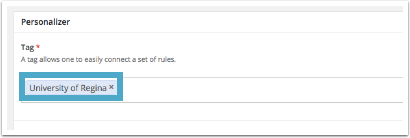
Next, name/identify your Homepage Personalizer by using the “Tag” area. The tag allows you to identify the Personalizer, and will also help you find the Personalizer in your Google Analytics data.
5. ADD RULESET BY USING THE GEOFENCING TOOL OR THE RULE EDITOR
Geofencing
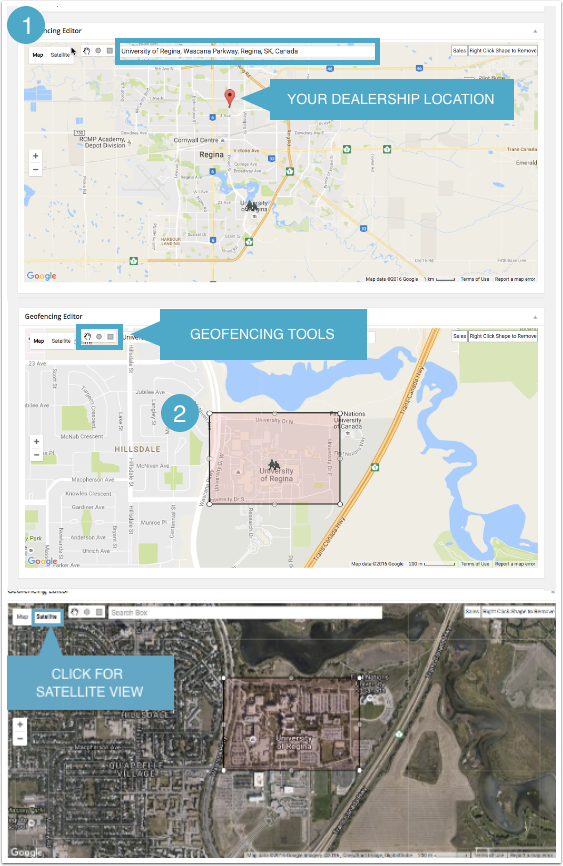
1. Type in the name or address of the business or area you would like to target. The pin will drop in the center of what you searched.
2. Select the Circle or Square Geofence tool and highlight the desired area.
NOTE: You also have the option to click “Satellite” to draw your Geofence in satellite view.
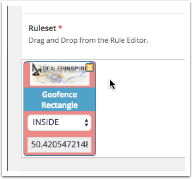
Drawing a Geofence automatically creates a Ruleset for you
After you create your Geofenced Personalizer, click on the blue “Update” button and your Personalizer message will be active.
NOTE: Geofencing may take up to 5 minutes to process the user’s location. It is best practice to test your Personalizers in an incognito window in a browser other than Chrome, such as Firefox.
Rule Editor
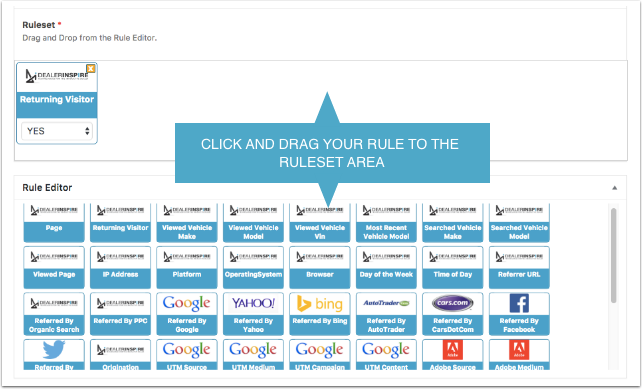
Drag and drop your rule into the Ruleset
6. ADD YOUR LANGUAGE RULE
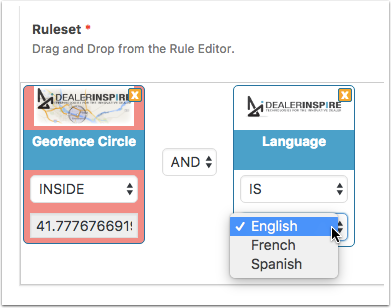
Once you set your personalizer rule, for both the English and the secondary language site, you will need to drag and drop the Language Personalizer rule for the respective language.
NOTE: Be sure the AND/OR option is set to AND.
7. PUBLISH YOUR PERSONALIZER
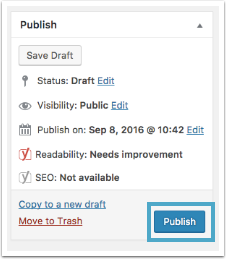
Once you have your rules set, and the language rule in place, click on the blue “Publish” button.
8. REPEAT ON THE SECONDARY LANGUAGE SITE
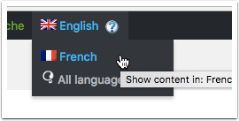
Switch to the secondary language by using the language toggle on the top WordPress menu bar. Once you are on the secondary language, re-create the personalizer using the same rules, and the respective language rule.