This document is a general overview of important visuals you will see on sites with Dual Language capabilities. WPML allows you to have a multilingual site for your customers. This particular plugin does not have translation capabilities, so all translations of content will be done by the author. With that being said, every page, post, personalizer and special needs to be duplicated. For example, if I have a landing page for a monthly event at my dealership, I need to essentially create two pages, one in English and one in the secondary language.
If your site is not multilingual and you are interested in using this tool please reach out to our Solutions Engineering team.
Language Toggle
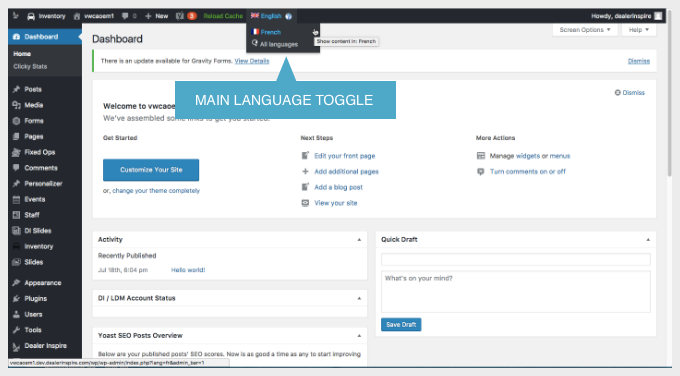
Your dual language site consists of two separate sites with one backend login. When adding content to your sites, be sure to add it to both the main and secondary language site. Always double check the language before adding content to the sites.
Language Setting of the Backend Tool
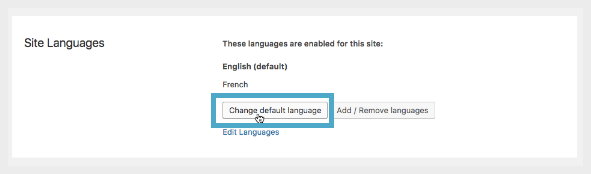
By default, the backend of your Dealer Inspire website will be translated in English. If you wish to have the backend translated into the secondary language, click on “WPML- Languages,” and change the site default language.
User Languages
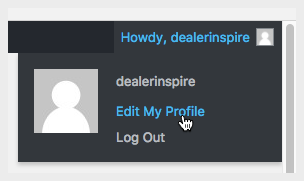
You also have the ability to change the default language per each user. To do this, go to your account settings in the top right corner, and click on “Edit My Profile”.
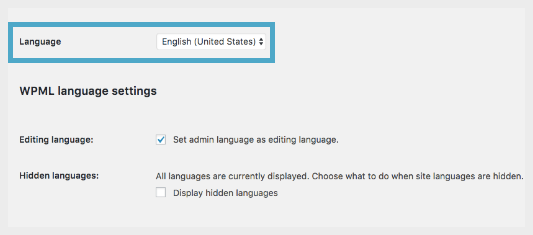
Once you are in your profile settings, click on the drop down menu and select your preferred language.
Icons
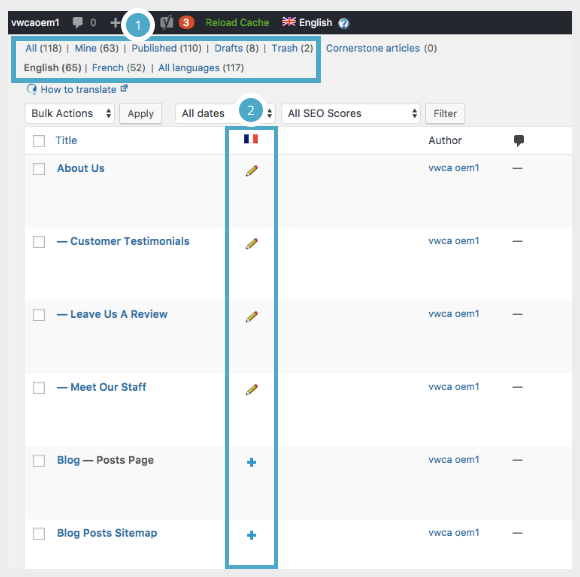
1. When you are viewing a specific content tab, you will notice a breakdown of your pages and posts. You can then see the difference between your primary and secondary language as well as your personal posts. One item to note when using the WPML plugin: as you delete a page from both languages, be sure to also go into the trash and delete both pages.
2. In the “Pages” tab, there are a few important icons. The pencil icon indicates that there is a page in the secondary language. You can click on the icon to edit the secondary language page. The “+” icon indicates that there is not a secondary language page and you can add it by simply clicking on the icon.
Posting Content
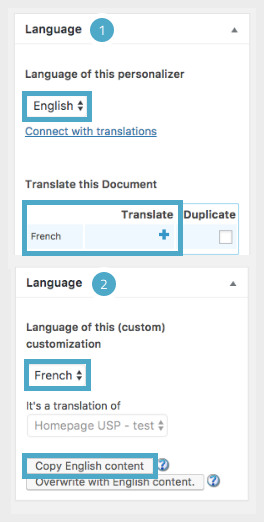
1. After posting your page/content for your first language, click “Translate” and then add in the content for the other language. You can always see the language of the page, post, personalizer in the drop down menu.
2. The second language box will appear on the secondary language page after you hit “Translate.” You will notice that the language drop down menu has changed to your secondary language. To translate the page, you can either simply begin typing your secondary language content, or choose “Copy English Content.” This will bring the English content onto the page so you can reference it as you translate. Once you have translated the page, you can delete the English verbiage off of your page.