1. Add New Coupon
2. Fill Out Title, Coupon Type, and Description
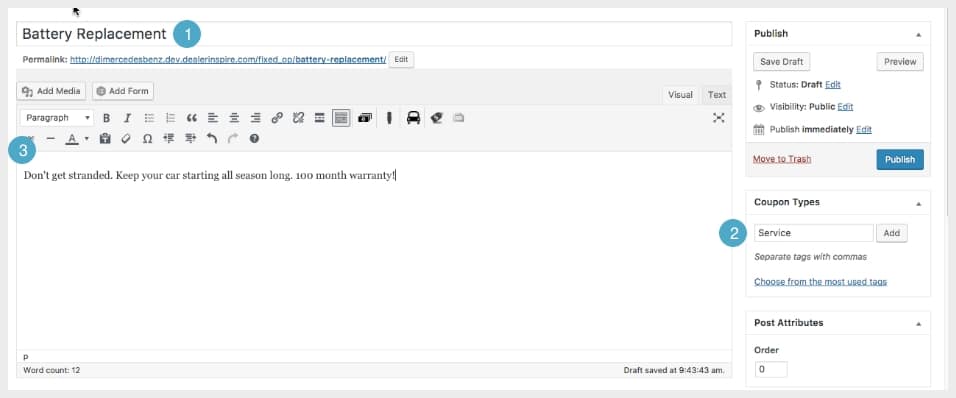
1. Give your coupon a title.
2. Type or select your coupon type. Coupons in Fixed-Ops can have multiple categories and they work like tags rather than a hierarchical structure. The tag names are used in the shortcode to list specials of a specific type.
3. In the main text box, add in an extra description about the coupon.
3. DI Fixed-Ops Settings

1. The “Icon Image” can be used to display on the left corner of a Service or Parts coupon. Use the “prev” and “next” button to scroll through the icon images already uploaded. You do have the option to upload your own Icon Image, in which a .PNG file is recommended.
NOTE: Dealer Inspire will upload a variety of grey transparent images into the media library specifically for the coupons.
2. The “Featured Image” will display at the top of the coupon and replace the “Icon Image.”
NOTE: Ideal size for a Fixed-Ops Featured Image is 500px X 315px.
3. The background color can be changed for the transparent images.
4. The subheading section is for additional information about the coupon/special. This can be used to add more info about an offer, e.g. 10%… etc.
5. Disclaimers will display in small text underneath the coupon heading, content, and subheading.
6. This expiration date will bring the coupon off of the live site and into draft mode on the selected date.
4. Button Settings

This allows you to change the buttons entirely on a per-coupon basis.
NOTE: If you DO NOT change the button builder settings, it will default to the global settings.
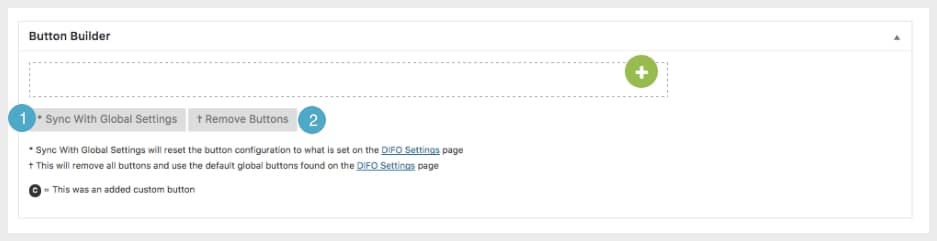
1. “Sync with Global Settings allows you to set the buttons to the three default buttons which are “Contact Us,” “Schedule Service,” and “Print Coupon.” It is possible to re-order the buttons by clicking and dragging over the buttons.
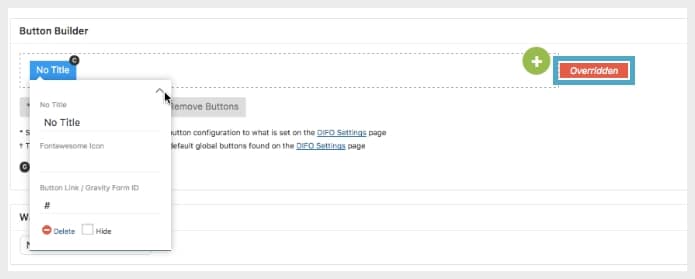
2. “Remove Buttons” will remove all the buttons you have created with the green “+” button.
Custom Buttons

When you add a custom button with the green “+” button, you will see a red “Overridden” message pop up. This means that the default buttons are overridden. You can click on the custom button and edit the title, Fontawesome Icon, and add in a gravity form or button link.
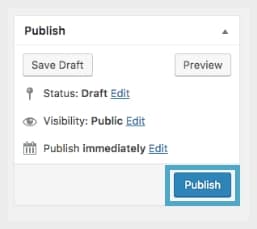
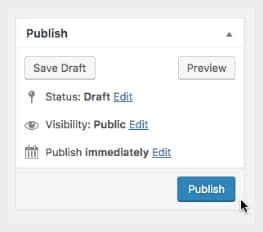
5. Publish Your First Coupon
6. Add the Coupon on the Secondary Language Site
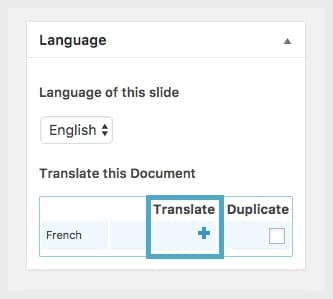
After you click on “Publish,” you will see more options populate in the “Language” box. Click on the blue “+” to start adding your slide to the secondary language site.
Language Change
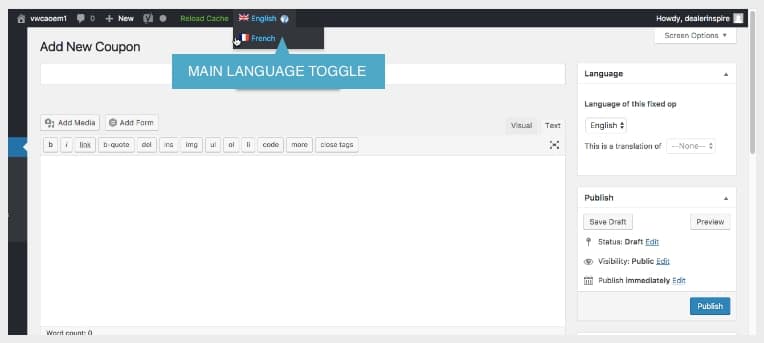
After you click on the blue “+”, you will notice the main language toggle at the top of the WordPres menu change.
7. Repeat the Same Steps with the Secondary Language Content
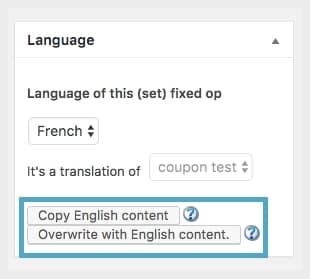
After you click on the blue “+” you will see a blank layout on the alternate language. The language box will show additional settings. Copying over the English content allows you to bring the English content into the secondary language coupon to easily translate the information.
Fill out Title, Coupon Type, and Description

1. Give your coupon a title.
2. Type or select your coupon type. Coupons in Fixed Ops can have multiple categories and they work like tags rather than a hierarchical structure. The tag names are used in the shortcode to list specials of a specific type.
3. In the main text box, add in an extra description about the coupon.
DI Fixed-Ops Settings

1. The “Icon Image” can be used to display on the left corner of a Service or Parts coupon. Use the “prev” and “next” button to scroll through the icon images already uploaded. You do have the option to upload your own Icon Image, in which a .PNG file is recommended.
NOTE: Dealer Inspire will upload a variety of grey transparent images into the media library specifically for the coupons.
2. The “Featured Image” will display at the top of the coupon and replace the “Icon Image.”
NOTE: Ideal size for a Fixed-Ops Featured Image is 500px X 315px.
3. The background color can be changed for the transparent images.
4. The subheading section is for additional information about the coupon/special. This can be used to add more info about an offer, e.g. 10%… etc.
5. Disclaimers will display in small text underneath the coupon heading, content, and subheading.
6. This expiration date will bring the coupon off of the live site and into draft mode on the selected date.
Button Settings
This allows you to change the buttons entirely on a per-coupon basis.
NOTE: If you DO NOT change the button builder settings, it will default to the global settings.
1. “Sync with Global Settings allows you to set the buttons to the three default buttons which are “Contact Us,” “Schedule Service,” and “Print Coupon.” It is possible to re-order the buttons by clicking and dragging over the buttons.
2. “Remove Buttons” will remove all the buttons you have created with the green “+” button.
Custom Buttons
When you add a custom button with the green “+” button, you will see a red “Overridden” message pop up. This means that the default buttons are overridden. You can click on the custom button and edit the title, Fontawesome Icon, and add in a gravity form or button link.
8. Publish Your Secondary Language Coupon