The Dealer Inspire Page Composer tool allows you to build custom pages that are more visually appealing and more dynamic than a basic page. This tool has pre-formatted row types such as Sliders, Image Galleries, and Accordion Content. For our more savvy users that are familiar with HTML & CSS coding you also have areas to put in your own custom code. We suggest a training session with the Training Team in order to effectively utilize the DI Page Composer tool.
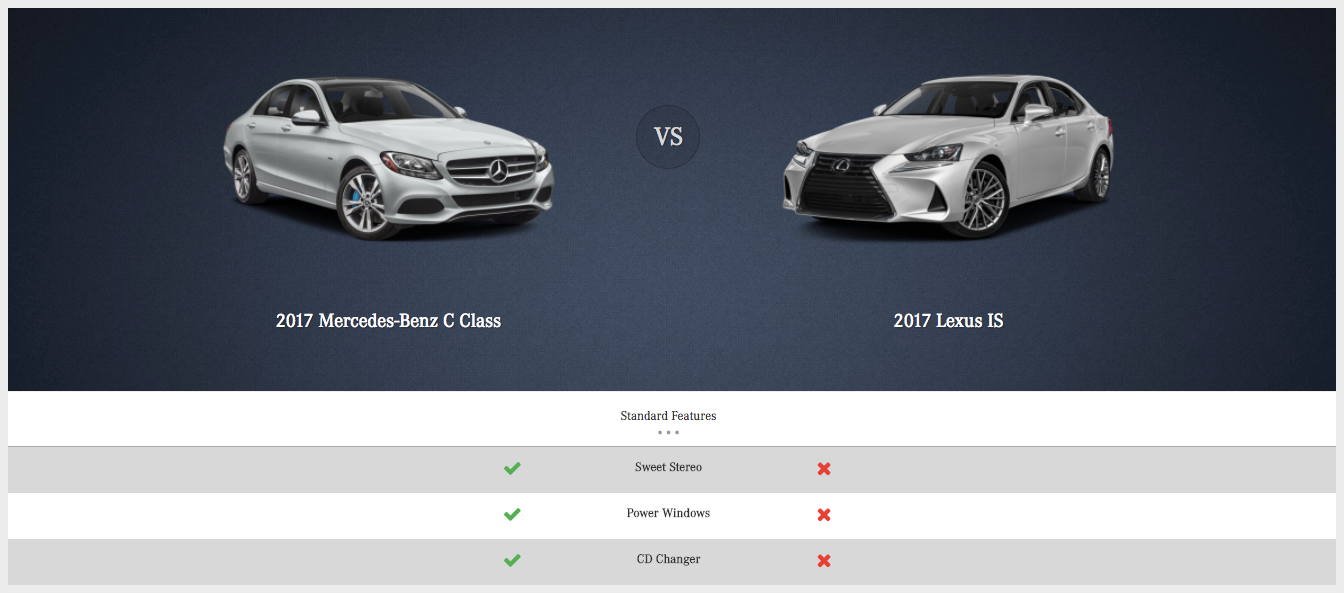
The Direct Compare Image Row is typically used in conjunction with the Direct Compare Data Row, as in the example shown below. This document will cover both row types.

Direct Compare Image Row

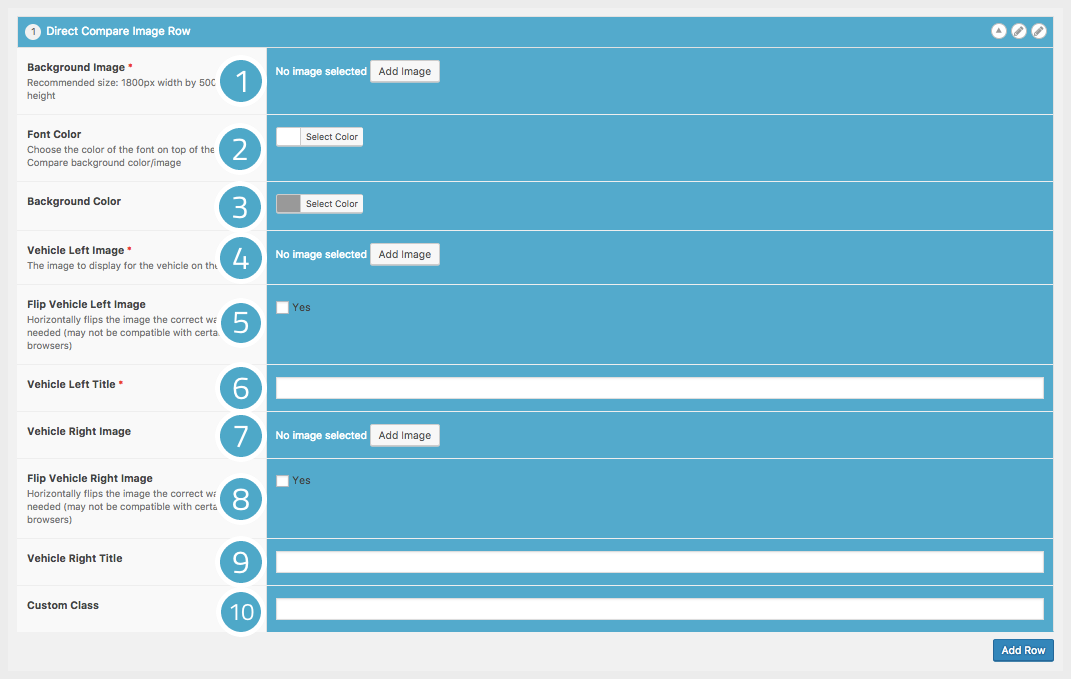
- Background Image – this is where you will add the background image that will go behind your vehicle images. The recommended image size is 1800 x 500px. Please be mindful of file size, as this will impact page loading time.
- Font Color – this is where you will set the color of the font on top of the background image.
- Background Color – if you don’t wish to have a background image, you can set a solid background color instead.
- Vehicle Left Image – this is where you will add the image for your vehicle. The image should be a transparent .png file, roughly 700 x 500px in size.
- Flip Vehicle Left Image – this will allow you to flip your vehicle image to face the opposite way.
- Left Vehicle Title – this title will display below the image of your vehicle.
- Vehicle Right Image – this is where you will add the image for your competitor’s vehicle. The image should be a transparent .png file, roughly 700 x 500px in size.
- Flip Vehicle Right Image – this will allow you to flip your competitor’s vehicle image to face the opposite way.
- Vehicle Right Title – this title will display below your competitor’s vehicle.
- Custom Class – you may use this area to target a custom CSS class, if you wish.
Direct Compare Data Row

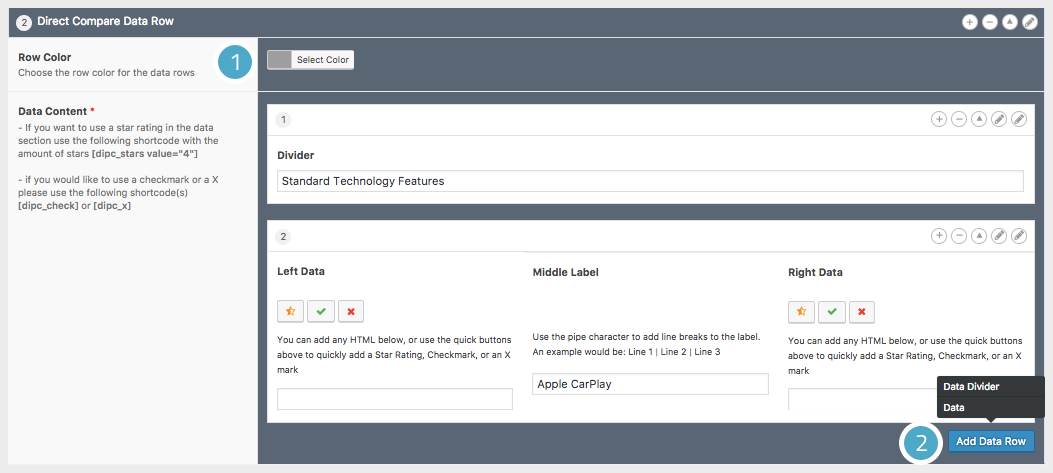
- Row Color – this is where you will choose the background color for your data rows.
- Add Data Row – clicking this button will allow you to add data about the vehicles you added in the Image Row. You can choose to add Data Dividers as well as Data.
Data Divider – this allows you to add section headings to your data (such as “Standard Technology Features” in the example above).
Data – this is where you will add your data. The Middle Label is whereyou will label the metric you’re comparing. The Left Data corresponds to your vehicle, and the Right Data corresponds to your competitor’s vehicle. You can add text here, or use the quick buttons to add stars, check marks, and X’s.
You can continue this process until you have added all the data you wish.