The Dealer Inspire Page Composer tool allows you to build custom pages that are more visually appealing and more dynamic than a basic page. This tool has pre-formatted row types such as Sliders, Image Galleries, and Accordion Content. For our more savvy users that are familiar with HTML & CSS coding you also have areas to put in your own custom code. We suggest a training session with the DICE Team in order to effectively utilize the DI Page Composer tool.
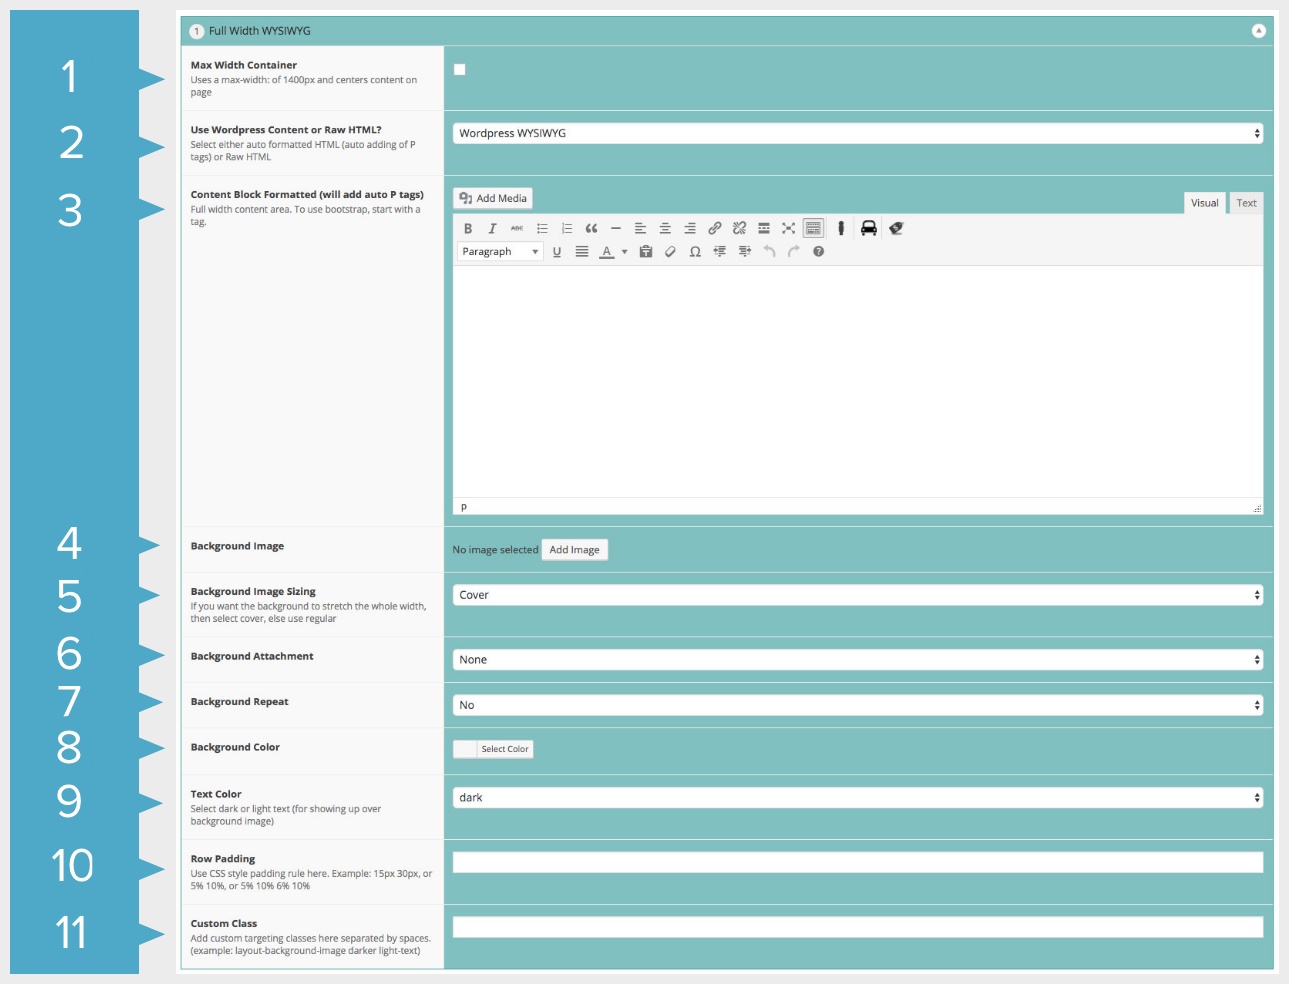
- Max Width Container – if you would like your row to be a max width of 1400px and center the content on the page, you can check this box.
- WordPress Content of Raw HTML – typically, when creating your pages you will leave this at its default of WordPress WYSIWYG. If you need to use raw HTML you may change it here.
- Content Block – this is where you can add in your text images for this section. This works just like the WYSIWYG area on a normal WordPress page.
- Background Image – if you would like to use a Background Image you can add it here. Background images should be at least 1800px wide. Be mindful of file size to ensure your page can load quickly.
- Background Image Sizing – you can choose from three options; Auto: will keep image the same size as what you uploaded. It will not stretch or shrink to fit responsively. Cover: this will stretch your image so it always covers the background. Contain: this will adjust the image to the largest size such that both its width and its height can fit inside the content area.
- Background Attachment – this gives you two choices Fixed or Scroll. Fixed: will create a “parallax” effect. Scroll: means the image will scroll with the rest of the page content.
- Background Repeat – if you would like your background image to repeat you can select “yes” here.
- Background Color – if you would like a color for your background instead of an image you can select the color here.
- Text Color – you have the option of light (white) or dark (black) text.
- Row Padding – depending on the layout of your site, you may need to add padding to the row to ensure it displays well across all devices. You may also have your Saved Vehicles tab on either the right or left, or you may be using a chat service that puts a tab on the right or left. You may need to add padding to ensure the text does not get covered up by those. Padding is essentially adding an invisible border around this content area. Padding is added clockwise: Top, Right, Bottom, Left. ex. 40px 25px 40px 25px So this gives us 40px on the top, 25px on the left, 40px on the bottom, and 25px on the left.
- Custom Class – if you know CSS you may target this area using a custom CSS class.